
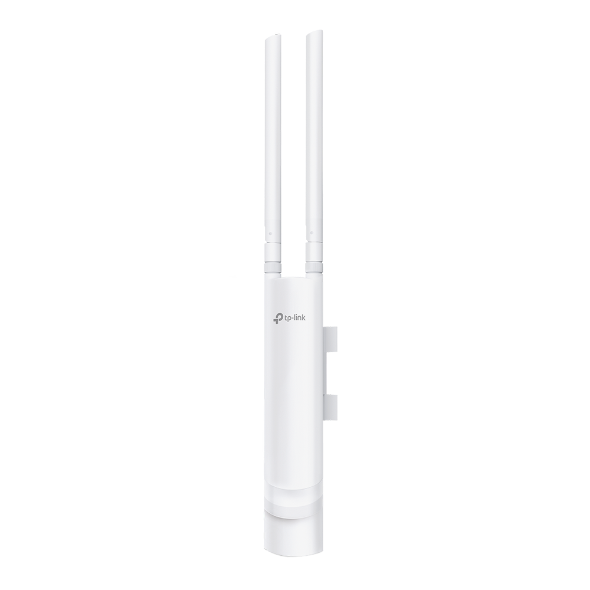
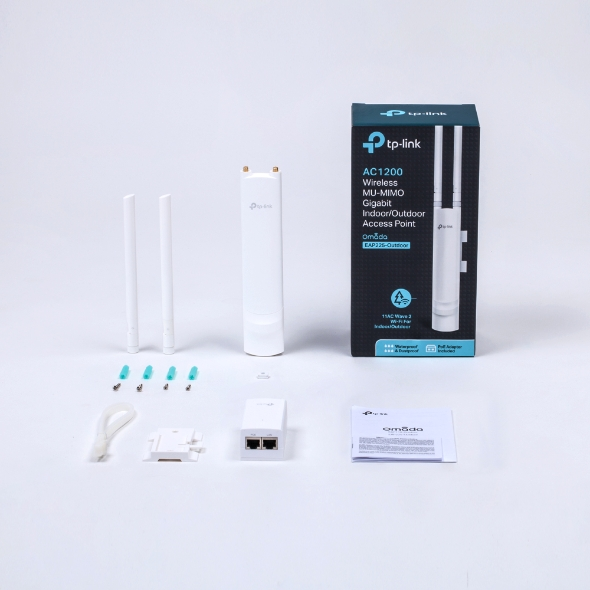
Hardware Components
- EAP (Access Point) unit
- Mounting bracket (for EAP)
- Passive PoE adapter with mounting bracket
- Antennas (2)
- Various mounting screws and accessories
- Pole mounting strap
- Waterproof rubber insert
Installation Steps
1. Prepare for Installation
- Lightning and ESD Protection: Proper grounding is essential for outdoor devices
- Use shielded CAT5e or above cable for connections to reduce ESD damage
2. Mount the EAP
Option 1: Pole Mounting
- Lead the pole mounting strap through the back of the EAP
- Position the EAP and wrap the strap around the pole
- Feed the end through the screw-block and tighten until secure
- Connect antennas and position them at 45-degree angles for optimal performance
Option 2: Wall Mounting
- Position the mounting bracket and mark screw holes
- Drill 6mm holes and insert wall anchors
- Secure the bracket to the wall with self-tapping screws
- Align the EAP with the bracket and slide it into place
- Connect antennas and position them at 45-degree angles
3. Connect Cables
- Remove the interface cover
- Connect an Ethernet cable to the LAN port (shielded CAT5e or above recommended)
- Insert the waterproof rubber insert for weatherproofing
- Replace the cover securely
4. Power Options
Option 1: Via Passive PoE Adapter
- Connect the EAP to the provided passive PoE adapter
- The adapter can be optionally mounted on a wall
Option 2: Via PoE Switch (EAP225-Outdoor only)
- Connect an Ethernet cable from the PoE switch to the Ethernet port
5. Software Configuration
Method 1: Standalone Mode (for configuring individual EAPs)
- Via Web Browser:
- Connect to default SSID (TP-Link_2.4GHz/5GHz_XXXXXX)
- Access http://tplinkeap.net
- Login with default credentials (admin/admin)
- Set up new username/password and configure wireless settings
- Via Omada App:
- Download TP-Link Omada App
- Connect to default SSID
- Open app and configure the EAP
Method 2: Controller Mode (for managing multiple EAPs)
- Use either Omada Software Controller or Omada Hardware Controller
- Provides centralized management via local access or cloud access
Important Notes
- The device has status LED indicators (refer to SYS LED Explanation table)
- Remote Reset feature is available for most models (not for EAP225-Outdoor)
- A DHCP server is required to assign IP addresses
- Maximum Ethernet cable length: 100m for steady power supply
- Proper waterproofing is essential for outdoor installation


 No products in the cart.
Reviews
There are no reviews yet.